Call us – National Call Centre 010 745 8650 – Cape Town 021 569 0112 – Port Elizabeth 041 110 1051

Best Binoculars for Bird Watching

The 8 best bird-watching binoculars—for beginners and enthusiasts

Ready to improve your bird-watching skills with a new pair of binoculars, but overwhelmed by the different price tags and features? We’ve got you covered.

Bird-watching, or birding, is one of the fastest-growing hobbies in the United States, thanks in part to the pandemic. According to a 2022 survey by the U.S. Fish and Wildlife Service, more than a third of Americans have taken up the pastime.

While you can observe birds without any special equipment, a good pair of binoculars for bird watching can help enhance the experience. With so many great options out there, it’s important to know what to look for.

“The biggest error that people make when buying binoculars for birding is that they choose ones that are far too small and are ill suited for their needs,” says Martha Harbison, the National Audubon Society’s senior network content editor in charge of testing binoculars. “Be mindful that you might have to spend a little money in order to get a pair that is decently useful to you. If you don’t wear glasses, that’s going to be slightly under $100. If you do wear glasses, it’s going to be slightly over $100, at least for an entry-level set.”

Generally, binoculars can cost anywhere from the mid $100s to over $2,000 with a wide range of features. Harbison recommends trying as many binoculars for bird-watching as you can to find the right fit for your eyes, body, and needs.

Our top pick for best bird-watching binoculars are the Nocs Provision Field Issue binoculars. This pair offers the features birders of any level need at a relatively affordable price. We also looked at other binoculars, weighing them for price, features, and ease of use. Read on for more.

Best overall binoculars for bird watching: Nocs Provisions Field Issue Binoculars

Green Nocs Provisions Field Issue binoculars.
PHOTOGRAPH COURTESY AMAZON

Check the price at Nocs or Amazon

Why we like it: Nocs’ Field Issue binoculars are affordable, compact, and waterproof to a depth of about three feet, according to the company. This model combines the same high-quality optics as the Nocs Pro Issue binoculars with the compact size and durability of the company’s Standard Issue binoculars. It comes in two sizes (8×32 and 10×32), with a comfortable rubberized exterior in multiple colors, a cleaning cloth, and a strap.

The Audubon Society loans Field Issue binoculars during events for their ease of use, ruggedness, and good magnification, says Harbison. The Field Issue binoculars are also one of National Geographic’s top travel essentials, as a great option for beginners or those on a budget.

Keep in mind: The Field Issue’s 32 mm objective lens diameter may not offer enough visibility in low light conditions, such as early morning, when wildlife tend to be most active. Harbison points out that the eye relief might cause some trouble for those who wear glasses because they only offer 16.8 mm of distance, making it challenging for glasses wearers to see through them. Some reviews mention that images can be a bit soft at the outer edges of the viewfinder.

Product details: Weight: 16.7 oz | Foot field of view: Up to 315ft @ 1000yd (10×32) | Foot close focus: 9.3 ft | Millimeter eye relief: 16.8 mm | Objective lens diameter: 32 mm | Magnification: 8x or 10x

Best budget bird-watching binoculars: Tasco Essentials

Why we like it: For any birder, it’s important to find a pair of binoculars that have a wide view field and good optics. Wide view fields let you spot birds in flight and in bushes and trees. Many bird-watching experts recommend that you start with 7x or 8x magnification and strike a balance between optic quality and price.

If you’re on a budget, Tasco Essentials are great entry-level binoculars for bird-watching. The optics are quite good for the sub-$60 price point, and reviewers note that they are light, bright, and offer true-to-life color. They’re also waterproof up to 3.3 feet for 10 minutes, according to the company, and come with a limited lifetime warranty.

A diopter on the right barrel helps ensure the eyepieces line up with your eyes. The focus wheel is located in the center, so you can make quick adjustments while tracking a bird.

Keep in mind: At 30 feet and 185 feet, the Tasco Essentials’ view field is relatively small. If you want to be able to see farther away, consider increasing your budget a bit. If you’re willing to expand your budget, the Nikon Prostaff P3 binoculars (see below) could be a better bet.

Product details: Weight: 10.2 ounces | Foot field of view: 185 ft at 1000 ft | Foot close focus: 30 feet | Millimeter eye relief: 16 mm | Objective lens diameter: 42 | Magnification: 8x

Best for bird-watching binoculars for beginners: Nikon Prostaff P3

Check the price at REI

Why we like it: The Nikon Prostaff P3 binoculars are waterproof up to 3.3 feet, fog proof, and shock-resistant, plus they feature the brand’s high-quality optics. Additionally, Harbison says she recommends this pair for bird-watching because they aren’t too heavy, come with a warranty, and offer 20.2 mm of eye relief, ideal for bird-watchers who wear glasses. You can opt for 10x or 8x magnification, depending on how steady your hands are.

Keep in mind: Some reviews note some distortion at the edges of the field of view, which can create a fishbowl effect if you’re trying to pan or keep up with a moving bird.

Product details: Weight: 20.3 ounces | Foot field of view: 377 ft. field of view at 1,000 yards | Foot close focus: 9.8 ft | Millimeter eye relief: 20.2 mm | Objective lens diameter: 42 mm | Magnification: 8x or 10x

Best pocket-sized birding binoculars: Swarovski Optik CL Curio Binoculars

Check the price on Amazon

Why we like it: The Swarovski Optik CL Curio binoculars landed on National Geographic’s travel essentials list for a reason. They’re compact (about the size of playing cards), easy to carry (they weigh just 8.9 ounces), resist water up to 13 feet, and have top-notch optics. With 90 percent light transmission, these binoculars can help you spot a Vaux’s swift from a black swift. Designed by Marc Newson, the Optik CL Curio feels good in the hand and comes in black and burnt orange.

Keep in mind: These have rubber eye relief, which means that birders who wear glasses may have to do some fiddling to get a clear image. They’re also pricey, but they’re still cheaper than the CL Pocket, which comes with more features than the Optik CL Curio and is slightly larger in size.

Product details: Weight: 8.9 oz (8×25) | Foot field of view: Up to 405 feet at 1,000 yards | Foot close focus: 8.2 feet | Millimeter eye relief: 16 mm | Objective lens diameter: 21 mm | Magnification: 7x

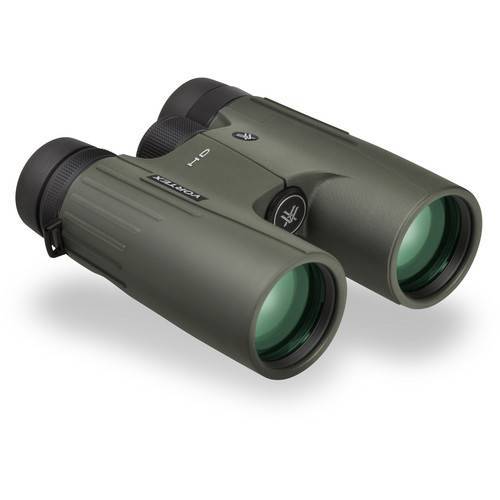
Best for bird-watching binoculars for low light: Vortex UHD

Check the price at Cabela’s

Why we like it: According to Harbison, the Vortex UHD 8×42 or 10×42 binoculars are great for low-light conditions, whether you’re bird-watching in a rainforest or in your backyard at dawn or dusk, when birds tend to be most active. The exterior is rubberized so you can keep a firm grip in wet weather. Bonus: they come with a lifetime warranty.

The best binoculars for bird-watching in low light offer superior glass over a larger objective lens, adds Harbison. The bigger the glass, the heavier and larger the binoculars become. The coatings used on binocular prisms and glass can make a world of difference in everything from optics to price. The Vortex UHD offers some of the best coatings available.

Keep in mind: The Vortex UHD are pricey. They are also relatively heavy at a little over two pounds, which can contribute to what Harbison calls “warbler neck.” That’s when your neck becomes tired and sore from supporting a heavy pair of binoculars while staring up at the sky or high into the trees for hours. Some reviewers also note that the focus feature is a bit slow.

Product details: Weight: 32.4 ounces (8×42) | Foot field of view: 420 feet at 1,000 yds | Foot close focus: 4.5 feet | Millimeter eye relief: 16.7 mm | Objective lens diameter: 42 mm | Magnification: 8x or 10x

Best smart binoculars for bird watching: Swarovski Optik AX Visio

Check the price at Adorama

Why we like it: Swarovski AX Visio binoculars are best for bird-watchers who have a big budget and want high-tech tools. This pair is equipped with a 13-megapixel camera that takes photos and videos, which you can download onto your smartphone and share. Images are geotagged so others can see where you spotted that presumed-extinct Ivory-billed Woodpecker. You won’t have to go searching online to figure out what bird you saw either. The AX Visio comes with the Merlin Bird ID app, which identifies more than 9,000 bird species, plus other animals.

Keep in mind: The battery on the AX Visio lasts for just two hours or as long as 15 hours, depending on what features you’re using. These bird-watching binoculars are also quite heavy and expensive.

Product details: Weight: 38.5 ounces | Foot field of view: 336 ft at 1000 yds | Foot close focus: 9.8 feet | Millimeter eye relief: 17.8 mm | Objective lens diameter: 32mm | Magnification: 10x

Best image stabilization for bird-watching binoculars: Canon IS

Check the price on Amazon

Why we like it: When it comes to image stability, the Canon IS series is one of the steadiest binoculars for high magnification settings. Its impressive stabilization technology instantly compensates (think a thousandth of a second) for any shake or stutter. That means you can get super close and still get a clear image of that “life list” bird, or species that bird-watchers have on their list of top birds to see in their lifetime. We also appreciate that you can turn off the image stabilization if you don’t need it. Like others on this list, these binoculars are also water-resistant and have a texture that helps prevent your hands from slipping.

Keep in mind: The Canon IS binoculars have a Porro prism, making them slightly larger and more conventional-looking than the other bird-watching binoculars on this list. They’re also heavy at 2.6 pounds and one of the more expensive binoculars on this list. The stabilization feature runs on a pair of AA batteries. When the power runs out, so does the stabilization. You’ll still be able to use the binoculars to spot birds, however.

Product details: Weight: 41.6 oz | Foot field of view: 236 feet at 1000 yards | Foot close focus: 13.7 feet | Millimeter eye relief: 15 mm | Objective lens diameter: 50 mm | Magnification: 15x

Best water-resistant bird-watching binoculars: Leica Noctivid

Check the price at Leica

Why we like it: Like Leica’s top-quality photography equipment, the company’s Noctivid binoculars offer clear, bright images. It’s one of two high-end, waterproof binoculars that the Audubon Society recommends. The other is the Zeiss Victory line of binoculars. Leica says its Noctivid is waterproof up to a depth of 16.5 feet, while the Zeiss are waterproof up to 16.3 feet. Both have 19 mm eye relief, making them good choices for people who wear glasses. We also appreciate that both binoculars come with limited lifetime warranties.

Keep in mind: Leica has one of the best reputations in the world for camera equipment, with prices to match.  Reviewers expressed frustration over the lack of a tripod attachment. The Noctivid also weighs a considerable amount, tipping the scales at nearly two pounds.

Product details: Weight: 30.3 ounces | Foot field of view: 405 ft at 1000 yd | Foot close focus: 6.2 ft | Millimeter eye relief: 19 mm | Objective lens diameter: 42 mm | Magnification: 8x or 10x

Our review process

There are many considerations for determining the best binoculars for bird-watching. How binoculars work, how they’re constructed, and why some cost more than others are all important factors. Harbison says it’s worth the time to try out as many binoculars as you can, noting how they fit in your hands and feel worn around your neck. Here’s what else we weighed:

  • Third-party reviews: We scoured online bird-watching forums on Reddit and Amazon plus sites like the National Audubon Society and Cornell Lab of Ornithology to find the bird-watching binoculars that received the best reviews. We also spoke to the National Audubon Society’s Martha Harbison, who leads the organization’s binocular testing program involving at least 100 testers.
  • Brand reputation: The best binoculars, like cameras, have high lens quality and are made by companies known for top-notch products. Most well-known camera brands (Canon, Leica, Nikon) make great binoculars and many offer lifetime or limited warranties.
  • Weight: Harbison says that birding can be an active pastime, requiring good core and arm strength to hold up a pair of heavy binoculars for long stretches of time. With that in mind, we considered each binoculars weight as part of our review.

  • Material: Binoculars are going to get scratched up and dropped. They are also subject to the elements, especially wet weather, making water proofing or some level of water resistance important characteristics. The best binoculars for bird-watching should be able to withstand these situations.

  • Value: You don’t need binoculars to go bird-watching, but they can enhance the experience and excitement of spotting birds. Whether you have under a hundred dollars to spend or thousands, we considered price and value in determining the best binoculars for bird-watching. Most birders can find a great pair with plenty of features in the $200-$1,000 range.

What to know about binoculars for bird watching

There are a number of technical factors to consider when choosing the best bird-watching binoculars for you. Everything from magnification and objective lens to size and weight can affect your bird-watching enjoyment. Here’s what you need to know.

Magnification

Binocular magnification is frequently referred to as “power.” Bird-watching binoculars typically have two numbers that refer to the magnification and the objective diameter (more on that below). The magnification number appears first and tells you how many times an object you’re viewing will be magnified.

It might make sense to go for the highest magnification you can find, but there are trade-offs. Higher magnification leads to more visible shake as a result of small movements (your heartbeat, vibrations). Higher magnification also reduces field of view and negatively impacts minimum focus distance.

It’s also important to note that many birders recommend avoiding variable magnification because it sacrifices optical quality for zoom. Zoom can cause your eyes to tire much more quickly if you’re birding for long periods of time.

According to the Audubon Society, most birders prefer a 7x to 10x magnification. If you want a steadier image, go for a 7x magnification. If you have steady hands, 10x might work best for you.

Objective diameter of lens

A pair of binoculars’ objective diameter is the diameter, in millimeters, of the lens that is closest to the object you’re viewing. The objective diameter tells you how large the binoculars’ lenses are and impact the amount of light that comes through. It’s usually expressed as the second number listed on binoculars.

Binoculars marked as 10 x 40 will have 10x magnification and a 40 mm objective diameter.  Larger objective lenses mean bigger binoculars with more low-light visibility. If you plan to hike with binoculars, aim for an objective diameter below 35 mm, which will be easier to carry. If you’re planning to remain in one spot while birding, go for larger objective diameters between 40 mm and 44 mm.

Wide field of view

The field of view in binoculars refers to the width and height of the image you see. Field of view matters because you need to be able to scan a wide area for birds that are taking flight. Many birders consider the field of view one of the most important factors for the best bird-watching binoculars. A wider field of view is helpful for new bird watchers too, as it has a higher margin of error when you raise the binoculars to your eyes. In general, the higher the magnification, the smaller the field of view and the more shaky the image may be. The field of view is frequently described in degrees or in feet at 1,000 yards. Most birding binoculars fall between 5.5° or 290 feet at 1,000 yards and 8.5° or 470 feet at 1,000 yards.

Size

How big or small your binoculars should be depends on how you bird-watch. If you hike or plan to walk around a city while bird-watching, you may want a smaller pair of binoculars. If you’re bird-watching from one spot, you can probably handle larger binoculars. The size will also depend on the type of configuration you choose and the kind of prism the binoculars have.

Prism types and coatings

The cost of binoculars varies widely based on the glass, coatings, and prisms they have. There are two binocular configurations: Roof and Porro. Roof configurations allow for narrower, more tubular binoculars with a smaller depth of field. Porro configurations tend to make binoculars larger and wider and offer a larger depth of field.

There are many types of prisms, but the most common are BAK4, BK7, and SK15. BAK4 prisms are made with Barium Crown glass, which is considered the best material. These prisms offer a circular field of view. BK7 prisms are more widely used and tend to be more affordable. They offer a vignetted rectangular field of view. SK15 prisms strike a middle ground between the two.

Eye relief

Eye relief is the optimal distance between the eye and the focal point where the light passes through the eyepiece on the binoculars. Most manufacturers use eyecups to position eyes in the right spot for viewing. People who wear glasses, however, may find that they can’t see the images clearly.

Some binoculars offer dioptric adjustments on one of the eyepieces. This feature helps fine-tune the images so you can view the binoculars without eyeglasses. Others use simple rubber cups that can be folded back or adjustable eyepieces. It’s important to try many binoculars to find the right eye relief for you.

Frequently asked questions

What is a good magnification level for binoculars?

Most professional bird-watchers recommend binoculars that offer 7x-10x magnification. Remember that unsteadiness increases with higher magnification, so consider the weight and size of the binoculars you choose. Larger, heavier binoculars can be more difficult to hold still or use to follow birds in flight.

What is the objective lens on binoculars?

The objective lens on binoculars is the lens that is closest to the object you’re viewing. The objective lens diameter, expressed in millimeters, determines how much light comes into the binoculars, which in turn determines how bright the image will be. The larger the objective lens diameter, the clearer the image in low light.

What’s the ideal eye relief in binoculars?

Harbison says that eye relief matters, especially if you wear glasses. She looks for binoculars that offer between 17 mm and 20 mm of eye relief to compensate for eyewear. Most binoculars on this list fall within or near that range.

Abigail Bassett is an award-winning freelance journalist based in Los Angeles, California. She has written for CNN, National Geographic, and Elle, among other outlets. Follow her on Instagram.
*Although we are sharing our personal opinions of these experiences or products with you, National Geographic is not endorsing these experiences or products on behalf of anyone. It has not performed product safety testing on any of these products, did not manufacture them, and is not selling, or distributing them and is not making any representations about the safety or caliber of these products or experiences for individual consumers. Prices and availability are subject to change from the date of publication.


How to Know Which Lens is Best Suited for You

Something that not many people seem to fully realise is that most high-end cameras are not nearly as simple as the point and shoot variants that have become increasingly popular over the years. While they provide the same use, which is to take photos and sometimes even videos too, they also provide a wealth of additional features and components that allow you to make the most out of your shooting experience. It should be noted, however, that not all components are compatible with all cameras, requiring you to do the proper research on which camera and compatible parts would work best for you.

Besides the camera itself, one of the most widely talked about parts of this image and video capturing device would have to be the lens. The lens is something that you attach to the front of your camera which secures it onto the lens mount and allows you to see what is being captured through your view finder. These lenses come in all shapes and sizes in order to provide their own uses and benefits. While it may be difficult to find a lens that fits all the criteria you would need to film in any context, some lenses are at least able to provide more variability than others, meaning that you don’t need to buy an overwhelming number of different lenses, but can rather fill all your needs with ease through the use of only 2 or 3 options instead. A great combination of lenses to have would have to be a prime lens alongside an adjustable zoom lens too.

A prime lens, although incredibly limited in its field of view due to the lack of any zoom features, is still more than capable of impressing any camera enthusiast thanks to the increased image quality they can provide. This increase in image quality is only possible due to the reduced number of moving glass parts within the lens itself, allowing manufacturers to place their focus on an image that is as crisp as possible without having to account for the user zooming in and out continuously.

A prime lens may be best suited towards shoots that are incredibly controlled and planned out as its limited field of view needs to be accounted for. Shoots such as this would include adverts, television shows, movies, music videos, and more.

Zoom lenses, on the other hand, provide their users with far greater variability in terms of its field of view by giving the option of being able to zoom in and out on the fly. This does come at the cost of reduced image quality unfortunately, but with the right camera, this may not even be that noticeable. While zoom lenses are still being useful on all the aforementioned shoots, they can be highly beneficial in shoots that are not as strictly planned or organised from a video production standpoint. These would include various event coverage shoots such as sporting events, wedding videos, stage plays, and much more.

Street Photography in India

John Grosse is an enthusiast photographer who has made Street Photography in India his lifes passion. In John’s words India is Incredible,Uninique and unlike any other destination. John’s work is a magnificent reflection of the many vibrant and diverse faces of India.

John’s  interest in photography started as casual and intermittent, using a Voightlander Vito 35 mm film camera given to him by his parents as a 1948 Christmas present . At the age of 50 John bought an Olympus OM10 SLR on the strength of a forthcoming tour of Western Europe with a group of architects. On his return his friend and architect colleague Garth Robertson invited him to join the Port Elizabeth Camera Club and later, to use his darkroom where he introduced John to the magic of colour printing. He was hooked!

Competing in the print section of the PECC he rose to Honours level, and as a member of PSSA achieved FPSSA(Colour Prints). The digital era brought a new challenge resulting in a FPSSA(Vers).

John and his wife Madge  have been privileged to travel quite extensively, including to Eastern Europe, the Middle and Far East. In 1984 they joined an Insight Tour to the East which included a week in India. Incredible India. Since then he has returned to India 14 times over the past 30 years!

Here is John’s experience of India;

Why India?

 Incredible India is unique, unlike any other destination in my travel experience, so photogenic it is a photographers dream.

The sub-continent is huge, with great variations between regions, each having   unique topography, climate, history, culture, built environment and people. Exciting image possibilities abound, as does vibrant colour.

The country is geared up to put itself on display and accommodate the diverse needs of any traveler.

My photographic interest has evolved into recording images of the handsome, friendly people of the older parts of the cities and villages, and their heritage buildings, monuments and bazaars. Some of the images accompany this blog.

Where and when to go

 The more research one does, the more successful ones trip will be. We used Lonely Planet guides and tour brochures at first, but today we have the internet. Reading the Raj Quartet and watching The Marigold Hotel movie will give an idea of what to expect.

For a first visit and in view of the vast number of options available, one should consider selecting a single region to explore. This will economize on travel time and expense. Rajasthan would be my first choice.

Go when it is cool and dry. For Rajastan that would be October to March (peak season). September would be less expensive and since this is a desert state you could miss the end of the monsoon rains.

How to travel

Typical tourist itineraries are available from RSA travel agents. Group tours may suit inexperienced travelers but will provide limited photo opportunities.

Our most successful visits have been arranged by Services International Ltd. New Delhi. Their website india-travelpackages.com is user friendly, loaded with information and options, and they will provide quotes promptly for standard or tailored packages.

The services we have used have included a driver with air conditioned car for 2 passengers, standard packages with minor modifications, and superior hotels

(B & B), heritage properties where possible (old palaces, forts and the like).We have not required the provision of guides, nor pre-payment for access to monuments.

Suggestions

 Remember that you are a guest in a foreign land.

  • Be as inconspicuous as possible (difficult with a pale skin and laden with cameras).
  • Ask permission before photographing people (a smile and mime will do). Back off if they object).
  • Work quickly when taking a portrait, before a crowd gathers to embarrass the model. Do not pay the model unless circumstances make this appropriate.
  • Most models pose with a serious facial expression. I believe the Hindi word for “smile” is something like “haso”.
  • English is spoken generally as a second language.

My gear

Canon EOS 5 / 35-70m Film Camera (retired)

Canon 20D / 28-135mm EF IS

Nikon P7800 (Having given up carrying heavy camera gear, this small camera caters for most of my needs)

Here are my some of my favourite memories of India;

Bath (Khajuraho)

Few Indians enjoy the privilege of private bathing facilities.

(In order to simplify the composition I cloned out the boy’s Mother who was in the water. This is not an image for a photojournalism competition)

Splash (Khajuraho)

 Without motor drive, several images were taken to record this action, the bather being unaware of my presence

 Our baby

We came upon this moving family scene out in the country at the roadside home of a dhurrie carpet weaver.

The soft pink of the young mother’s sari sets the joyous mood.

Dhobi wallah (Mumbai)

I believe that this landmark open air laundry has been closed. Originally the washing was done manually by dhobi wallahs (laundry men) who lived in shanties on site, and fetched and carried bundled laundry on porter’s barrows. The workers were reputed to be illiterate, but had a marking system which insured the identity and safe return of all belongings handled.


Trader (Mumbai)

 It takes courage and (cheek) for a foreign traveler to ask a local stranger to pose for a portrait, and I am always pleased to receive a positive response to my request. I am not surprised when the model has to be encouraged to smile.

Do not be reluctant when young Indians ask you to join them (as an unusual member) in a group photograph.

Prep (Jaiselmer)


On the street (Mumbai)

 This image was made at Mumbai’s Apollo Bunder, location of The Gateway of India, the triumphal arch erected to commemorate the visit of King George V in 2011. In the adjacent waters of the Arabian Sea are colourful ferries to Elephanta Island, and nearby is the world famous Taj Palace hotel.

Indians are enthusiastic visitors to public spaces and tourist attractions in their own country so expect crowds. Where payment for access is required of foreigners, it is usually free or minimal for locals.

The adult pictured here seemed happy to be photographed, but ten minutes after my departure he appeared at my side, without child, asking for payment (the child was not necessarily his). We are told that many of these street dwellers prefer the freedom of that life of begging to the restrictions of a more regulated environment.

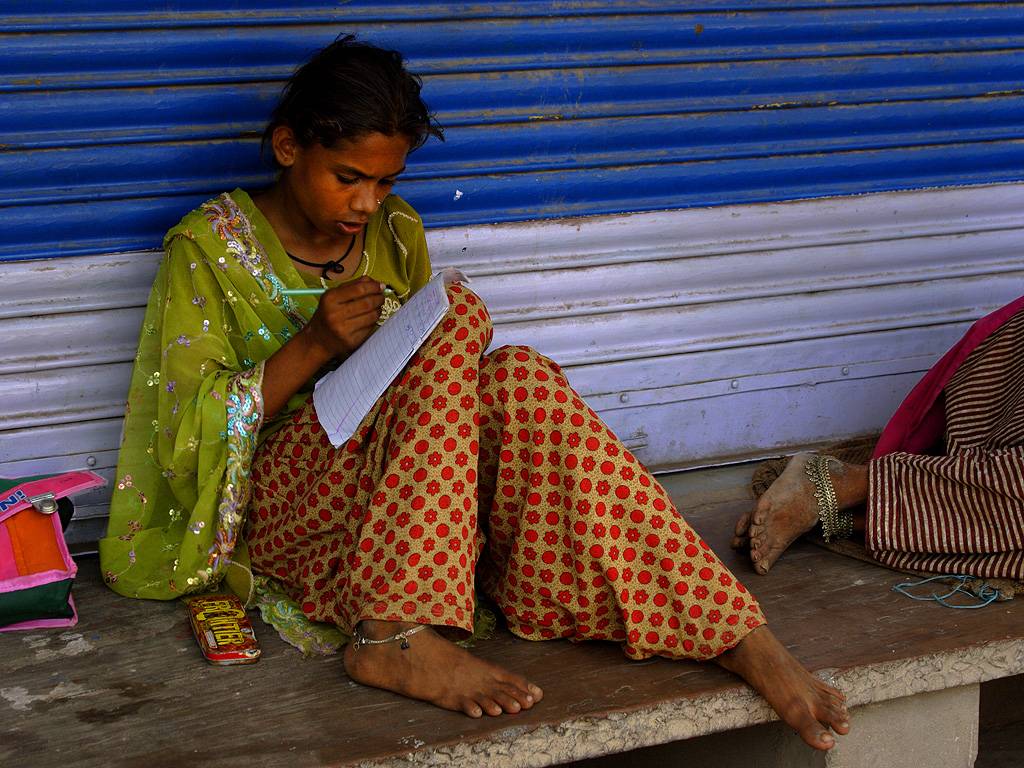
Homework

Food Street  (Karauli)

 Freshly cooked street food is usually safe to eat, but likely to be “spicey”.

If offered an option specify “not too spicey”.

“Delhi belly” used to be an occupational hazard, for which we have found the best cure to be “Kantrexil” which requires a script. Avoid the obvious eating risks.

Hberdasher

A fairly slow shutter speed shows movement in the folding of this shop keeper’s wares after departure of a customer.

Most street photography requires a hand held camera with the attendant constraints involved. Image stabilasation and rapid adjustment of ISO available in digital cameras helps deal with some difficulties.

Bus stop (Fatehpur)

A covered sidewalk bus shelter in a village street.

 One could write a novel about the thoughts in the minds of each of these people.

Buy one (Mysore)

Either a natural talent or this white haired lady had been photographed before. When I crouched down (with difficulty _ age) to photograph, she struck this delightful pose. I’m sure she knew that I wasn’t a customer.

Mysore is well known for its luxurious silk fabrics and fragrant sandalwood soap.

Neighbour 2 (Aurangabad)

 This seller in a street market smiled shyly at a neighbouring colleague while I tried to sort out an image.

News (Bundi)

This village street side doorstep must be the local “club”. The next image was taken a few years later at the same spot.

Bundi is a charming “medieval” walled village built in a valley, and overlooked by a fortified palace.

SMS (Bundi}

Mobile phones, an international pandemic!

News 2 (Ajmer)

The shopkeeper’s colourful headgear and character full face caught my attention, and his concentration on the news paper added interest.

Be prepared to point and shoot, before the moment has passed or your presence has been noticed.

Many shop fronts are open to the street, sidewalk or market, making a wealth of picture material readily accessible to the photographer. Of course one has to cope with the matter of crowds of shoppers.

Stringer

Maker of colourful thread bracelet braid, worn by all ages, sometimes as a sign of group allegiance.

With a population of over one billion, self employment and micro business enterprise are common features of Indian society, as are extended families of three generations living together.

Whitehead (Pushkar)

This one legged man sat on the ground against a street boundary wall, near the Lake Palace Hotel in Pushkar. He did not beg for alms, but always smiled in acknowledgement of a greeting, and touched his heart in thanks for any contribution.

We missed him on our last visit, and on enquiry were told that he had passed away.

Pushkar is a holy pilgrimage town built around a lake, where devotees come to immerse themselves in the waters. It is also the location for the famous camel fair photograph by Ernst Haas.

Glare (Jodhpur)

This image of a man reclining on his street side doorstep in Old Jodhpur was a “grab” shot taken without permission. It was only when I noticed his expression of displeasure that I saw his disability. His glare was a well deserved rebuke of my inconsiderate action.

Peace pipe (Gwalior)

I noticed one shop in Jaiselmer with signage saying “government ganja store”.

This smoker appeared to be unconcerned about being photographed partaking of the weed.

Shave 2

Another image that relied on this shop having an open front (closed at night with a steel roller shutter) on the street edge.

I saw more shaving than hair cutting in barber shops.

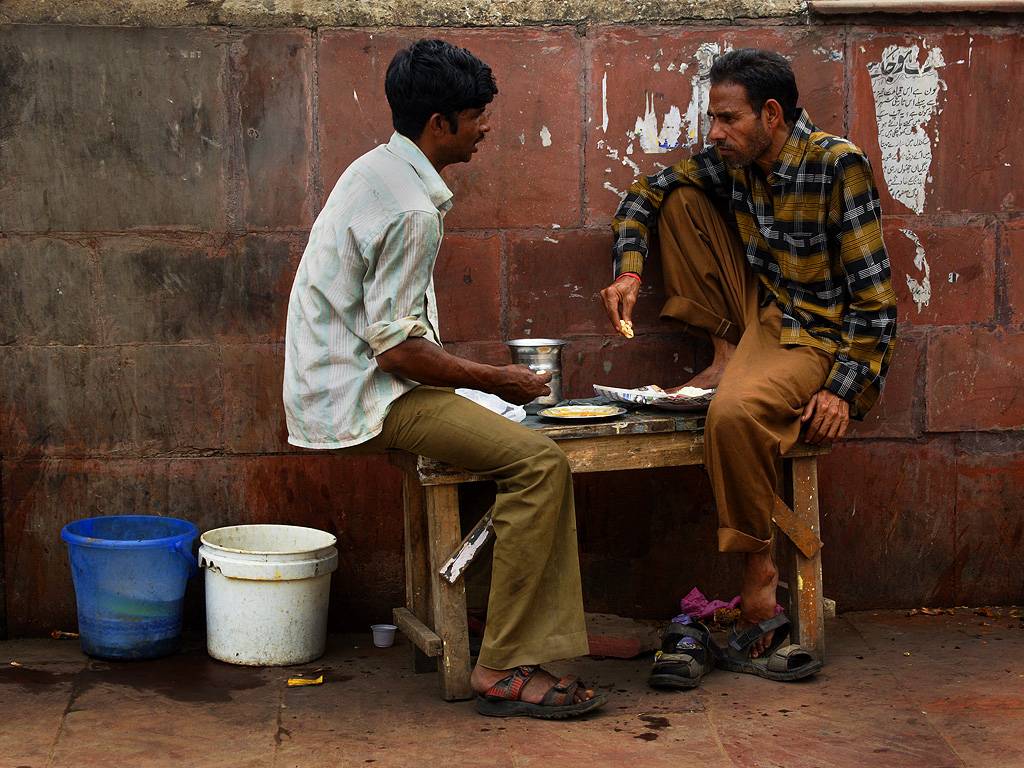
Business lunch (Old Delhi)

 Market traders taking a break.

High (Lohargal)

The glazed stare was the only response I received to my mimed request for a picture. One can only speculate about his thoughts.

News 3 (Omkareshwar)

Seems that newspaper readers make easy photographic targets, being less aware of what is happening around them. This fellow is on a high bridge across a river bisecting the town, and trafficked by vehicles, people and animals.

Wash (Orcha)

The village pump is both a community meeting place and a public bathroom. Modesty is a cultural prescript and in public the women bathe fully clothed in their saris.

Loner (Mathura)

Matura is a riverside holy pilgrimage town not far from Delhi.

On this damp day at the end of monsoon rains, we could not get near to the temples along the river bank due to high water levels. The orange and yellow robed holy man had the same problem, but was a colourful subject against the blue wall. He didn’t seem interested in the photographer.

Pushkar pilgrims (Pushkar)

We complain about potholes in our streets. I noticed that this large puddle was reflecting the colourful dress of the pilgrims passing by, and waited for the right moment.

Tank (Lohargal)

By good fortune we happened upon a season of pilgrimage to this remote temple complex and tank out in the countryside . This appears to be both a spiritual and social event. Note that most of the women bathe fully clothed. The men use a separate, roped off area of the same tank. The water comes from a flowing stream and is replaced continuously (but this is not the case at all tanks).

I tried to keep my photographic activity as discrete as possible, and no one objected to our presence as the only foreigners around.

Topless

Photographed at another temple complex, the women dry their saris after a ritual cleansing in the tank. In this case the men used a separate tank.

Heena moustache (Jaipur)

This middle aged concierge on the sidewalk outside a Jaipuri jewellery store was a co-operative model, despite the passing crowd, and his having to neglect his doorman duty. I had to reward him for this memorable image.

Festival 2   (Chomu_near Samode and Jaipur)

Religious, traditional and community festivals are a regular feature of Indian life, and can provide exciting, colourful images. You may get lucky even if your itinerary does not include these activities. Dates for major festivals are available from India tourism organisations.

Alley (Khajuraho)

Khajuraho town is a world tourist destination, famous for its group of millennium old temples each of which is heavily embelished outside with stone carvings depicting aspects of Indian life of the period. Gods and goddesses, warriors and musicians, real and mythological animals abound, and the repeated theme shown in greater detail than anything else is women and sex, every possibility of the Kamasutra.

The simple image shown here reflects the reality of local village life.

Monopod (Varanasi)

This one legged man with an improvised crutch sits on the stepped ghats of the holy Ganges river at Varanasi. It is the aim of many pious Hindus to visit this holy city and, if possible, die there.

Sikh trucker

I don’t remember the location of this truck stop where our driver pulled off for lunch. I do remember it being a seedy establishment with a rough clientele, and a proprietor who marched around with a curved dagger in his belt.

I was careless about our tea order, and we received a sweet, milky, boiled brew served in a glass. From our table we could see the glassware being washed in “water” the colour of that tea. The safer order would have been black tea, with milk and hot water separate.

If you prefer chai you will probably get the sweet boiled variety with the addition of a “curry” masala (spice).

In the parking lot I spotted this Handsome trucker and managed to capture a portrait of him looking down at me from the open window of his truck cab.

Bundi sleeper 2 (Bundi)

Permission was not requested for this image of a cycle rickshaw driver asleep in a roadside shelter.

THANK YOU John for your amazing images and for sharing your amazing experiences with us.

Wild Life Photography in the Kalahari

Our planet is beautiful and amazing. Images of exotic places that we will probably never see, leave us in awe of the pure splendour of the Earth. Skilled wild life and nature photographers get to go to those places to capture the beauty and the drama for us all to share. Jill Sneesby is just such a photographer.

Jill is an internationally acclaimed wildlife and travel photographer based in Port Elizabeth, South Africa. Her work has won many international awards and in the 2010 African Photographic awards she won “Nature Photographer of the Year”. She has been published and exhibited all over the world in galleries such as the Smithsonian in the USA, the Natural History Museum in the UK and Asociaţia Euro Foto Art in Bulgaria.

Much of her time is spent in wild and exciting places both close to home and anywhere across the globe where she travels to photograph, lecture and judge.  Her judging and lecturing credits include many prestigious photo events in countries as varied as the United Kingdom, Canada, the United States of America, Austria, United Arab Emirates, Doha, China, India and of course South Africa.

Sharing her knowledge and expertise is one of her passions and she runs photographic workshops from her studio in Port Elizabeth as well as photo tours to many exciting places.

Jill is 1st Vice President of the Photographic Society of South Africa and Chair of the Portfolio Distinctions division of the Photographic Society of America.  She is the Liaison Officer for the International Federation of Photographic Art.

She has been recognised for her photography and service having been awarded honours by photographic societies worldwide. Here is Jill’s experience of the Kalahari.

“I can still remember the thrill of seeing my first big male lion in the wild. It was in the Aoub river bed in the Kalahari Gemsbok Park (now known as the Kgalagadi Transfrontier Park), the wind was blowing his mane and it was a sight to remember. I didn’t have a fancy camera at that stage, in fact just a “mik ‘n druk” so you can imagine how small in the frame the lion was, but it didn’t matter, it was the sheer pleasure of watching him stroll across the valley to the waterhole that made it so memorable.
In fact the initial shot of the whole valley is the one that means so much to me as it tells the whole story, yes the photo ops did get better as the lion approached the water but it instilled in me a love of the environment and how important that is in the bigger picture and in the photograph.


The trees with their iconic Sociable Weaver nests whether shot against a dramatic stormy sunset or against the stark blue desert sky take you back immediately into the Kalahari.
Another early memory that I will never forget is the sound of a jackal alerting everyone around him that there was a leopard in the area. So we sat a while with binoculars glued to our eyes, trying to see that beautiful, elusive creature, and there he was, resting in a tree.


My only record of that sighting, although there have been many more as this one shows, is the tree in the landscape with a black X marked on the print by me to show where the leopard was. But the sound of the jackal will stay with me always and whenever I hear them giving their alarm call I stop and look to see what has caught their attention.


Much of the time the tourists only want to see the lions but there is so much to see and experience and while this image doesn’t really tell you what a jackal looks like it does show you the bigger picture as it walks off along one of the well-defined animal tracks.
While driving around you do need to be on the lookout yourself but don’t forget to watch the animal behavior around you – the animals always need to be on the lookout and their behavior will alert you to the possibility of possible action unfolding.


The image of the springbok herd shows them alert, and all looking in the same direction – what are they looking at? Well cast your eyes to the right and there, walking down the Nossob river bed, is a pride of lion, just peacefully walking and the springbok sensed this and so watched them and did not run, just staying alert to make sure nothing changed.
Don’t get me wrong, I love going in close and capturing the action or the moment. The images that remain in my memory are, more often than not, those that tell the whole story, such as this extreme close-up of a Lioness and Cub.


The mood and lighting of the next image is beautiful as is the contrast between the size of the mother and cub but what you don’t know is the story behind the image which makes it particularly poignant for me. Knowing the story in this case doesn’t make it a better image but it will always stay with me as one of my special moments. We had been fortunate to see the cheetah with her kill the previous day and such a precious sighting it was when she called her two cubs to join her. Then horror of horror, a lioness came along to steal her kill, but she didn’t just steal her kill, she stole a cub and walked off with it in her mouth, at first glance you would have thought it was her own cub. Once it was dead she dropped it on the ground and returned to the kill, which by now of course had been abandoned by Mother Cheetah and her remaining cub.


Teary eyed we left the scene, despondent at the loss of the cheetah baby. Next day, driving in the same area we came across this scene, a wonderful sight to see, Mother and her remaining cub and the lioness nowhere to be seen.


Sometimes you see a Lion with porcupine quills hanging from his mane – in the Kalahari the Lions eat porcupines and therefore you know just what he has been up to. Porcupine are generally nocturnal creatures so most of the time the lion does the eating at night.


Occasionally you are lucky enough to see one during the day and this is very unusual and we were very lucky to see the behavior and photograph it. In this instance there was a mother and young porcupine who, by standing head to head, were able to present a total ball of quills to the two young lion making it impossible for them to kill them. The happy ending for the porcupines is that they managed to get away.
One of my all-time favourites was the atmosphere as a herd of Springbok came pronking and running through the valley towards the water at sunset, all in their quest to reach the water. It was a very dry time, hence all the dust.


Every day and every season is different, each with their own beauty so there is no right or wrong time to visit – and once you have been there you will yearn to go back.

The Art of Street Photography

Street photography or candid photography as it is also know is as close as most of us will ever get to Photo Journalism. Its about capturing an image that tells a story about a place, people or a situation, and it does it spontaneously. Street photography  often takes you out of your comfort zone which makes it adventurous and exciting.

What we hope to achieve by this Blog is to share the experiences of some amateur street photographers and to expose their work. By doing so we will also take you to places you might never see or experience. That is the art of Street Photography. We will also provide you with links to more detailed incites into the art by recognised experts.

Wikipedia defines street photography as “photography conducted for art or inquiry that features unmediated chance encounters and random incidents.”

Typically, street photography is about candidly capturing life in public areas. And contrary to its name, street photography does not have to be done on the streets. You can do street photography anywhere.

Photography Life has published a most informative introduction to Street Photography.  Elizabeth’s  “Complete Guide to Street Photography for Beginners“. It is more than a useful aid for those wanting to embark on this very rewarding art form.

This article would not be complete without sharing the experiences of some of the Photographers who have embraced Street Photography as a hobby. The work of Jan Van Heerden is a great example of how a hobbyist can reveal the naked soul of a City. Jan was born and bred in Johannesburg South Africa. We asked Jan to give us a run down of his modus operandi. Here is what he said;

“I started photography in 2014 with the intention of compiling a history of the informal traders in Johannesburg’s townships. At that stage my job took me to 45 townships which presented me with an ideal opportunity to record the informal traders. I subsequently left the job and I never got my project off the ground.

One day while driving through the Johannesburg CBD a whole world opened up. I realised there was a glut of photographic opportunities. With my Canon 7D and a 18-135mm kit lens I embarked on a new adventure.

I usually go out early on a Sunday morning. The streets are quite with almost no traffic. I try to be unobtrusive as possible. I carry my camera in a plastic shopping bag. I don’t wear bright coloured clothing.

The only time I will ask permission to take a photo is if my subject objects to me taking their picture. I want the image to be as spontaneous and as telling as possible. If they object I normally show them the image and offer to e-mail it to them. I have never had anyone decline my offer.

I have taken pictures of cable thieves, gangs, assaults, drug addicts shooting something into their veins.

Whenever I feel uncomfortable I will walk away. Some places are a bit scary and provoking confrontation is not an option. I go solo and therefore avoid trouble as far as possible. My advice is not to attract too much attention, don’t use telephoto lenses, if confronted apologise and walk away. I always keep my car within short  distances from where I am.

Take it easy if you do go out into the street, first explore areas familiar to you. Not many sites are as formidable as the Johannesburg CBD”.

Johannesburg was at one time one of the richest cities in the world producing almost a third of the worlds gold. The city center was the hub of a bustling financial phenomena. It exploded into existence at the end of the nineteenth century and within twenty years became a monument to to the riches of the soil. Some of the worlds richest men built their castles with the help of great architects like Sir Herbert Baker. The City Center reflected that opulence, but when the restrictions of apartheid were lifted there was a massive influx of impoverished refugees from all over Africa and rural South Africa, that slowly eroded the opulence. Jan’s work captures the new soul of Johannesburg’s inner city with its new character, decay, charm and sometimes ironic beauty.

Here are some of his images with his own captions;

These men eke out a meager existence by scavenging household discarded waste. Here they are busy sorting the waste into plastic, paper and cardboard. This was taken at an empty residential property that was demolished to make space for a development.

I was attending  a wedding. It was a rainy day and I was cooped up in hotel room waiting for the service. I gazed through the window, contemplating the lack of photography for the day. When I saw this person in the street on his mobile phone. It presented an ideal photo opportunity.

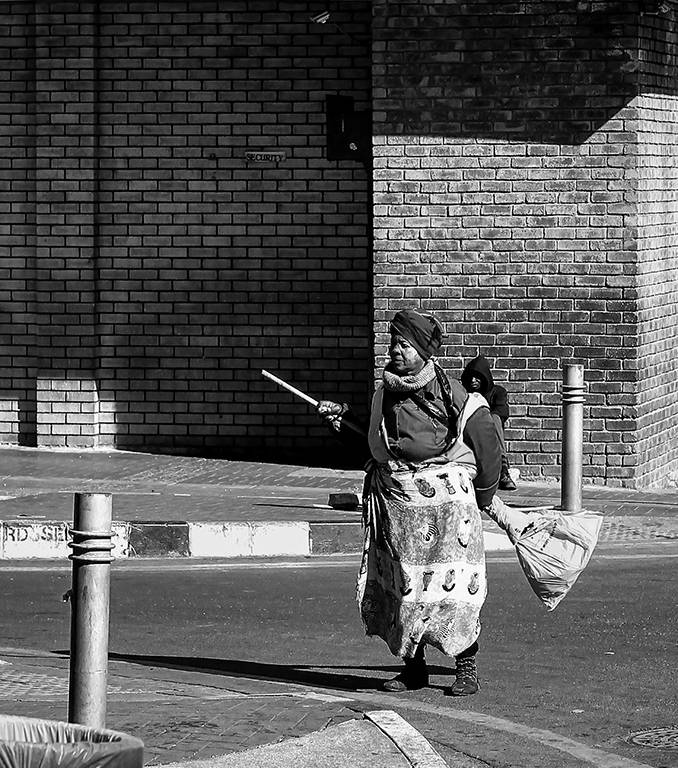
This image was taken in Newtown in downtown Johannesburg.  I noticed this street cleaner approx. 200 meters away and waited for her to come within ‘shooting’ distance. Only when I viewed the photo on my computer, did I notice the man sitting behind her. His face is visible  behind her left shoulder.

Westdene Johannesburg.

The grime and neglect attracted me to this building. I took a few photos and this group of men entered my view. I kept on taking photos and once again when I viewed the images at home, I realised that this was potentially a bad move on my part.

I titled this photo ‘Cool and the Gang’ One is not always aware of ones surroundings when taking photos. It has happened on a number of occasions.

Services are glaringly scarce in places where the payment of property taxes are not popular. A The lack of garbage collection and a culture of littering is prevalent.

Like every major city the homeless are a reality.

Many of the grand old buildings have become canvases for some spectacular graffiti.

Newtown

The recycle men are all over town. This was taken at the Museum Africa. The building was erected in 1913 and was the first fresh produce market in Johannesburg. It was the largest building in South Africa on completion.

Today the building houses Museum Africa and The Market Theater.

This entire area is a classic example of urban decay.

Informal workers eke out a living collecting recyclable waste and transporting it on their trolleys sometimes over great distances, to depots where they get paid by weight for paper and plastics.

Fox St. Johannesburg CBD

This facade attracted me. It is adjacent to the Standard Bank Commissioner Street.  Built in 1908, there was an influx of people in search of their fortunes, after the discovery of gold.

Fordsburg Johannesburg.

This man is the king pin at this recycling site. All collectors have to pay him and ‘entrance’ fee before they can sell their recyclable material at the collection site.

Constitutional Hill at The Fort in Hillbrow.

11 Kotze Street  Hillbrow was built betwwen 1896 to 1899 for the purpose of holding British soldiers captured  during the Anglo-Boer War. After the war it was converted into a regular prison.

I saw the old lady sitting on the bench having lunch.

A waste collector on his way to the depot.

Newtown

Johannesburg city has become one of the biggest exhibitions for talented graffiti artists anywhere in the world.

FARADAY STREET

Traditional medicines or “Muti” as it is known is big business in the informal sector. Operating from a sidewalk this trader offers cures for every known affliction.

Newtown Johannesburg.

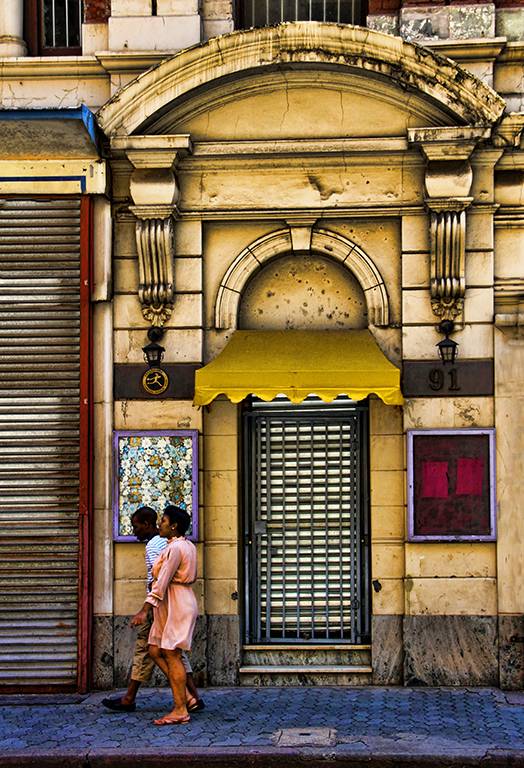
I am not sure what happens in this building. I photograph graffiti and this building drew my attention. It could be a music club, but I saw people going into the building in the morning and no music to be heard. When I saw the two pedestrians walking past looking into the doorway I took the photo. Often it is just luck that gets the timing right.

Fietas Johannesburg

It is an old suburb and has fascinating old buildings.

Fietas is the unofficial name given to this suburb, it’s official name is Pageview. It is one of Johannesburg suburbs steeped in unfortunate history.

During the apartheid era the inhabitants, mainly Indian traders were removed by force from their homes.The suburb was renowned for it’s traders and the white people flocked to 14th street for bargains. The traders were relocated to the Oriental Plaza. The shopping and atmosphere has never been the same.

One of the fascinating old buildings in Fietas. There are buildings dating back to late 1800’s.

Fietas

Another historical building in Fietas. It is a fascinating area to visit.

Diagonal Street opposite the old Johannesburg Stock Exchange

Carmel Building constructed in 1897 is one of Johannesburg Heritage sites.

The man leaning out of the window was an opportunity not to be missed.

Braamfontein Kotze Street, Johannesburg

There was a Graffiti painting festival in Braamfontien. I am fascinated by graffiti, maybe a morbid fascination so I decided to visit the area. I came across these two young ladies taking photos of each other. It was an ideal opportunity for me to take a photo.

Ferreirasdorp Johannesburg.

I came across this magnificent work of art with the assistance of a stall trader at no 1 Fox street. 50 meters from this site.

The photographers in the scene give one a perspective of the scale of this Graffiti

Ferreirasdorp Johannesburg

My unofficial guide asked me to take his photo in front of this giant mural of the Lion and human face. This entire area was previously known as Chinatown, famous for its Chinese Restaurants.  After the decay set in they left.

Newtown

The supporting pillars of the M1 Highway formed these lovely leading lines.. I waited for the person with the red jacket to enter the scene. One can see his red jacket reflection in a weather puddle in the road.


Newtown

This red building is an Iconic sight in Newtown. This building used to be the cold storage facility when the fresh produce market was still trading across the road.

This man was praying arms in the air and it presented a fantastic image. One has to be ready for these fleeting moments.

Johannesburg Commissioner Street.

I find this old decaying building fascinating. It is situated across the road from the Johannesburg Central police Station.

I have not been able to get any information on this building which  is still occupied.

Jeppe Street Post Office  Johannesburg.

The Post Office was filled with amazing Art Deco and Frescoes. There is an underground tunnel from the post office to Park Railway Station. It had a conveyor belt system to move the post to the railway station. Johannesburg has a network of underground tunnels, one of them was from The Fort to the High Court (behind the post office) to transport prisoners to the court. Many of these tunnels have been bricked up. The tunnels are infested with Rinkhals snakes who feed on an abundance of rodents.

JOHANNESBURG CBD

This is a typical street scene of Johannesburg facing west from The Standard Bank.

Standard Bank Commissioner Street

The Standard Bank Building was opened in it’s current  form during September 1890. Prior to that the bank operated from a tent.

The opening of the bank in 1886 coincided with the gold rush in Johannesburg and the Witwatersrand.

JOHANNESBURG FORT

The main entrance to The Fort. Situated in Hillbrow Johannesburg.

The South African Constitutional Court is built behind The Fort in Kotze street.

The Fort has significant historical value. Nelson Mandela and Mahatma Ghandi were both imprisoned here. Nelson Mandela was held in the hospital section of the prison.  These are only two of the numerous prisoners, that played a important role in our history.

The Fort was built to house British  POW during the 2nd Anglo-Boer war. After the war it was used as Johannesburg Prison.

The Three Castle building in Marshall street Johannesburg, was opened by Paul Kruger in 1989 almost the same time as The Fort.

The architects were Carter and MacIntosh.

The 3 turrets on the building represent ‘The Three Castles’ cigarettes. The building was bought out by United Tobacco company. In later years the building housed many nightclubs, one well know club was The Dungeon.

The once grand entrance to The Castle.

CONCLUSION

We thank Jan Van Heerden for his wonderful contribution. In coming Blogs we hope to feature more revealing through the lens incites into other parts of the world.

Better Bird Photography

Better Bird Photography

By Andre Nel, Johannesburg.

May, 2019.

National Geographic photographer, Jim Richardson, is famous for saying: “If you want to be a better photographer, stand in front of more interesting stuff”.  However, as the acclaimed English photographer David Yarrow notes, gaining access to stand in front of interesting stuff is the hardest part of the photographic process.  We in South Africa are spoilt for choice when it comes to wildlife.  Birds are particularly accessible to us – many can be found in your own garden, so you can have easy access to great subject material to photograph.  Do not take this privileged position for granted – South Africa is one of the most biodiverse countries on earth and we have a greater variety of birds than the whole of Europe.  From my little house in suburban Johannesburg, I am visited by more than 40 species and if I am prepared to take a short ride in my car, my choice rises to hundreds.  South African photographers looking for interesting subjects need look no further than home and you don’t need a National Geographic budget.  One quiet, humble and elderly photographer whose work I have come to admire is Gerrit Lotz from Tugela Mouth, Natal.  With over 200 species of bird close to his home, he has chosen to specialise on photographing one – the Pigmy Kingfisher.  His seminal portfolio on the bird is both spectacular and unmatched – even by National Geographic.

Bird photographers come from a variety of backgrounds.  I was an experienced photographer simply looking for more interesting stuff to stand in front of.  Gerrit Lotz was driven by his passion for conservation of a little-known species and knew nothing at all about photography when he started.  There are also many ways of accessing birds and it is impossible to favour just one.  Some people like to hike and observe birds as they walk; some like to sit in a hide and others like to drive around.  All of them work – just pick the one that suits you best.  The same applies to equipment.  Some favour an expensive “great white” lens for birds, but cheaper alternative options are becoming available every day.  The key ingredient to a great shot is skill, not equipment.  If you do not believe me, look back at the great work done by Peter Ginn in the 1970’s, photographing birds with moderate focal lengths onto 35mm transparencies.  His work is exemplary, even by today’s standards.

Whatever reasons you have for wanting to photograph birds and whatever equipment you have, you would do well to learn from those who have walked the path before you.  My experience is that people in the field need on-the-spot advice when a great opportunity presents itself and since the biggest errors relate to lighting, background and pose, it makes sense to keep these in mind while you are shooting, because you cannot correct them later.  Ask yourself:  is my lighting appropriate?  Background? Pose?  In practice, paying attention to these “big three” points while shooting will make a big difference.  Let’s start with lighting.

The two photographs above were taken just seconds apart.  The one on the right is a good deal better than the other because there is a catchlight in the bird’s eye.  This small detail makes a huge improvement.  With birds, a catchlight is most easily achieved if the lighting is low, front-lighting.  Bird photographers will sometimes say: “Point your Shadow at the Bird” because of this.  Front-lighting is not the only form of lighting that is good for birds, but it has many beneficial qualities and is a good form of lighting to master.  It is a good place to start.

Background (and foreground) to your subject is also important in bird photography.  Try and chose surroundings that do not detract from your subject, as they do in the following shot.  Background is an important factor that is easy to overlook while shooting – you need to make a conscious effort to review your background in the viewfinder and adjust your shooting position to make corrections.

Finally, pose.  Avoid postures that look awkward and favour viewpoints that show the bird off well.  In particular, avoid photographing birds from underneath – this often happens in an attempt to get close to a bird in a tree.  That pose is rarely complimentary.

With the basics of these three points covered, let me consider some photographs where they have been applied mindfully.

Ravens are notoriously difficult birds to photograph, because they are dark and it is hard to capture detail.  Worse than that, they have a black eye set in black plumage, making detail even harder to resolve.  White-necked ravens, like this one, have a white collar that is easy to over-expose in one’s zeal to get detail in the blacks.  Classic early-morning front-lighting excels in situations like this one.  Combine appropriate lighting with a soft background and an interesting pose and the result is pleasing.  Although the subject is a common bird, the final result is mainly the product of careful execution of three things.

I wish to draw your attention to two additional factors which further strengthen this raven shot – the angle of view and the use of depth-of-field.  Both of these combine to give the image an engaging quality that captivates the viewer.  This illusive quality is hard to define, yet causes the viewer to ponder.  Engaging your viewer is one of the most desirable aspects that an image can have in today’s world, when we are spoiled for choice of powerful images.  In one of his books, David du Chemin refers to these “additional factors” as: “Layers of Awesome” and says that when multiple good points are combined into one shot, the resulting image gets stronger.

Some people have felt that the crop on this image is too tight – what do you think?  Be careful to answer from the heart and not the rule-book.  To me, the tight crop used here brings you into the world of the raven and makes the photograph more engaging.  An expansive crop, showing the bird as master of the sky would also have worked, but that would have been an entirely different photograph, telling a different story.  Not the story I want to tell.  Giving a “bit more” space all round would tell neither story.  It would follow the rule-book and satisfy the “paint-by-numbers” critics, but they are not the people I care to appeal to.  The tight crop I have chosen is intimate and was purposeful.  When you shoot with purpose, it shows and your images tend to be more powerful.

Let’s move on to another image.

Pause for a moment to observe that this image has the same attention to lighting, background and pose as the previous one.  In addition, we have a lovely perch here and some food – two extra bonuses, or “more awesome” as du Chemin would put it.  We have good detail in both the blacks and in the whites.  This is the result of careful exposure setting – avoiding over-exposure of the white patches in particular, while at the same time being careful not to “crush” the blacks into detail-less oblivion.

Note the use of shallow depth-of-field in this shot – the bird’s face is sharp, but focus fades off progressively towards the tail of the bird.  The viewer’s eye is immediately drawn to the sharp area, which is exactly where I want it to go.  How do you like that purposeful treatment of depth-of-field?  Some people have felt that closing down the aperture a couple of stops and putting the entire bird into focus would produce a “better” image.  However, I love this image as it is because it is more engaging and pulls your eye to where I want it and into the life of the kingfisher.  All of the parts that need to be sharp are pin-sharp – eye, beak, fish and droplets of water falling from the fish.  The rest of the image is sufficiently sharp for the secondary role that it plays.  My use of depth-of-filed here has been purposeful.

Consider, by comparison, the photograph above, which does use a smaller aperture to keep the entire bird sharp.  The “message” or “story” of this shot is entirely different to the previous shot.  Here, we have a majestic, almost regal pose that benefits from a different photographic treatment – one that is more formal and therefore less intimate and engaging.  The pose, composition, perch and even the crop are more appropriate to the formality.  Keeping everything in focus is a treatment that is appropriate to this shot.  This is not a better photograph than the last – simply different.  Nonetheless, both shots are purposeful in terms of the photographer’s intent and that is an important ingredient to the success of the photos.

Finally, as far as this portfolio is concerned, consider the hornbill above.  The core elements of lighting, pose, background and even intimacy are all there, but a new and vital element is the ant – because it is so small, it needs to be pin-sharp and needs to stand out against the background.  This requires a paper-thin depth-of-field and the plane of focus needs to include the hornbill’s eye and beak.  Once again, this execution is very purposeful and results in a strong image.

With the photos presented here, I hope that I have shown how a checklist of simple things to remember can be helpful in the field.  Once you have mastered them, you are free to add additional ingredients of interest to create compelling images.  All of these images were taken close to home, on a moderate budget.

Here are some additional images to evaluate against the criteria outlined.

Introduction to Photography

The oldest photograph I have is a print taken of my Great Great Grandfather around the 1880’s. The first ever photograph of a human was taken almost accidentally in 1838. The picture is interesting not only from an historic perspective but also because it teaches us about one of the fundamentals of photography, time and movement. The equipment was obviously pretty crude at the time and it required a time exposure of ten minutes to get the image at all. The photograph was taken of the Boulevard du Temple in Paris. During the exposure there must have been a lot going on in the Boulevard,  horse drawn carriages  and lots of pedestrians, but you don’t see them in the image at all because they weren’t still enough during the exposure to make an impression. The only person you see and hence the first ever photograph of a human was the person in the bottom left side of the image who stood still long enough because he was having his shoes cleaned;

Photography Today

A little more than a hundred and fifty years later we have reached the stage where just about every one of us is walking around with a pretty sophisticated camera in our pockets. More photographs are now being taken every day than were taken in the whole history of the world up until ten years ago. The interest in, and the ability to take photographs has been one of the most significant products of the technological revolution. But is it Photography?

Photography is the art, application and practice of creating durable images by recording light. It is a recognised art form and a subject offered by art faculties in most universities around the world. Yet some of the worlds greatest and most successful photographers are self taught. It is the best hobby in the world because not only is it an art form and hobby in its own right but it compliments whatever other interests you might have. Smart phones might have presented us with the instant gratification of capturing just about every aspect of our lives and travels but they do not give us the control over light that is the Art of Photography. What they have done however is created an unprecedented interest in Photography. The digital era has given us easy access to the Art. In the era of film it was always and expensive and tedious business developing our images. We also only got one shot at it with often very poor results. Now in the age of Digital Cameras, once you have your equipment the cost of taking photographs is zero and the opportunity to learn the Art has never been greater.

As mentioned earlier Photography is the Art of recording light. Light in this context is what we see with our eyes. Everything we perceive through our eyes is the reflection of light off the subject we are looking at. Our brains interpret  and edit the light instantly to give us a sense of depth, movement, speed, and colour. Our brains also adjust the exposure and focus of the image we are interested in. The image we see can have tremendous meaning, it can have incredible beauty and drama and it can move us in a way that we would like to remember. The Art of Photography is to capture that image in the way we remember it. It strives to capture the beauty, the emotion, the drama, the movement and the colour of a moment in time that we would like to remember and share with others. It tries to replicate what our brains perceived through our eyes in that moment in time.That is the difference between a snapshot and photography.

The first step to becoming a photographer is to acquire the equipment that will give some control over light. It doesn’t have to be an expensive exercise. For example, even the cheapest DSLR or Mirrorless camera will give you exactly the control you need to practice and learn photography. My favourite photograph is a landscape I took in Scotland with a very basic six megapixel Bridge Camera. It has been printed on an A1 canvas and is hang on the wall in my study. As you advance in the Art or Hobby you will decide what you need along the way. With the correct equipment there is nothing you can’t capture, from Microscopic to Astral and everything in between.

Although the principles of taking good photographs and the skills required have not changed at all from the days of film, what has changed is the digital format of the images. The digital nature of our images has created a spinoff art form called digital manipulation. With editing software images can be simply enhanced to re-create what our eyes perceived in that moment in time or we can use the original image or images to create a unique work of art. New technology is giving us more in-camera control over things like depth of field and more visual control via interactive LCD screens but a bit of editing and sometimes make a huge difference to the final result.  I have given a before an after example below to illustrate what I mean;

Basic Editing

Creative Editing


First Steps

As you start your journey in the ART of Photography, like everything else in life one has to take the first steps. Darren Rowse of the School of Photography has some very Useful Tips to set you on your way. In further expanding your knowledge there are some very informative free tutorials online. You will also gain a wealth of knowledge by interacting with other photographers. Your Local Camera Club will offer some great opportunities to interact and learn.

Lens Filters Q’s & A’s

My lens came with a lens cap, so why do I need a filter?

If you ask most consumer-camera owners why they keep a filter on their lens, a majority will most likely reply, “For protection.” Although filters do, in fact, protect the surface of your lens against dust, moisture and the occasional thumb print, the primary function of lens filters is really to improve the image quality of the pictures you take—depending on the filter you’re using and how you use it—in a variety of obvious and not-so-obvious ways.

Are there a few basic filters or do I need to buy many filters?

The most basic filters are ultra-violet reducing filters (UV), Skylight filters and protection filters, which depending on the manufacturer are either glass filters with basic anti-reflective coatings, or in some cases, merely plainclothes UV filters, which isn’t dishonest. To keep the front element of your lens clean and safe, any of the above will suffice, but if you’re looking to protect your lens and improve the image quality of your stills and video, you’re going to want to purchase a UV or Skylight filter.

Without UV haze filter (L); with UV haze filter (R)

UV filters, also referred to as Haze filters, are designed to cut through the effects of atmospheric haze, moisture and other forms of airborne pollutants, each of which contributes to image degradation. UV/Haze filters are available in varying strengths. If you plan on photographing near large bodies of open water, at higher altitudes, in snow or other conditions that magnify the intensity of ambient ultra-violet light, you should definitely consider a stronger level of UV filtration (UV-410, UV-415, UV-420, UV-Haze 2A, UV-Haze 2B, UV-Haze 2C and UV-Haze 2E). Depending on the strength of the UV coatings, UV filters appear clear, or in the case of heavier UV coatings, have a warm, amber-like appearance and require anywhere from zero to about a half stop of exposure compensation.

An alternative to UV/Haze filters are Skylight filters, which are available in a choice of two strengths—Skylight 1A and Skylight 1B. Unlike UV/Haze filters, which have a warm amber appearance, Skylight filters have a magenta tint that is preferable when photographing skin tones or using color slide film, which depending on the film stock often has a blue bias that is typically counterbalanced by the magenta tint of Skylight filters.

Regardless of their strength, skylight filters do not have any effect on the camera exposure, are equal to UV filters in terms of cutting through atmospheric haze and protect your lens against dust, moisture and fingerprints that can all be damaging to lens coatings if not removed in a timely manner.

I’ve found 52mm UV filters for as little as R150 and as much as R500. What’s the difference and why should one UV filter cost two or three times more than another?

Even though one UV filter might appear indistinguishable from another UV filter costing two or three times as much, the differences between them can be considerable, beginning with the quality of the glass used in the manufacturing process. Though one would suspect there’s little difference between one piece of glass and another, make no mistake about it—there’s glass and there’s glass, and the differences can make a difference in the quality of your images.

The primary criteria of good glass versus so-so glass are the chemical composition of the glass, how it was made and even where it was made. These are followed by the thickness of the glass (the thinner, the better) and the coatings used to minimize flare and maintain optimal color and contrast levels. Although the differences between an inexpensive filter and a pricier filter may not be all that apparent when photographing with a kit zoom lens, they become increasingly obvious when used with costlier, higher-performance lenses.

In the case of color and Polarizing filters, which typically consist of a thin layer of color film (or Polarizing material) sandwiched between two layers of glass, the film is usually bonded to the glass layers in pricier filters. This eliminates air surfaces and other irregularities that can negatively affect the optical purity of the filter when compared to less expensive filters designed to perform the same functions.

The other difference between entry-level filters and the pricier versions has to do with the retaining rings, which in the case of cheaper filters are invariably made of aluminum (a relatively soft metal) that are subject to denting and jamming if they’re not screwed on straight. Conversely, the retaining rings used on pricier filters are most always made of brass and as such are less likely to get jammed onto your lens or dent when they strike hard surfaces.

The bottom line is if you go the extra mile (and expense) by purchasing a better lens, you shouldn’t compromise the results of your investments by saving a few dollars on the filter.

What are Kaeseman filters and why are they priced noticeably higher than regular filters?

Kaeseman filters, which are invariably Polarizing filters, are manufactured with more weatherproofing seals than non-Kaeseman filters. They are worthy investments if your photographic interests include traveling to and working in damp, extreme climates.

Aside from UV/Haze and Skylight filters, what other types of filters should I consider for everyday picture-taking?

If you photograph landscapes—or any outdoor scenics for that matter—you should certainly have a Polarizing filter handy at all times. Polarizing filters are best known for making clouds seemingly pop out from darkened blue skies, saturating colors and eliminating glare and reflections from the surfaces of water, glass and other polished surfaces.

Without polarizing filter (L); with polarizing filter (R)

Polarizing filters are mounted in a secondary ring that you manually rotate while viewing your subject through the viewfinder until you dial in the desired level of Polarization. The downside of Polarizing filters is that you lose about three stops of light in the process of optimizing the image, but the results cannot be mimicked using Photoshop plug-ins or other forms of post-capture voodoo.

Polarizing filters are also available combined with additional filtration such as warming filtration (81A, 81C, 81EF, 85, 85B), Enhancing and Intensifying, Skylight, UV/Haze and a measure of diffusion.

Polarizing filters are available in two formats: linear and circular. Though they look and perform identically, circular Polarizing filters are designed specifically for use with autofocus lenses while linear are best used with manual-focus lenses. Circular Polarizers, on the other hand, can be used with AF or MF optics with equal results.

What are Neutral Density filters and how would I use them?

Neutral density (ND) filters are essentially gray-toned filters designed to absorb calibrated degrees of light as it passes through the lens. Most commonly broken down in 1/3, 2/3 and full-stop increments, ND filters are more recently also available as variable-density filters that you can infinitely adjust by rotating the filter on its mount as you would a Polarizing filter.

There are many applications for ND filters. Chief among them is their ability to allow you to shoot at wider f-stops under bright lighting conditions. ND filters are used extensively by filmmakers and videographers as tools that allow them better exposure control due to the limited shutter-speed options afforded by the cinema and video process.

ND filters also make it possible to blur the movement of pedestrian traffic and flowing water under bright lighting conditions by allowing you to drop your shutter speeds while maintaining full control of how much or how little depth of field you desire, based on the amount of ND filtration you place in front of the lens.

What’s the difference between Neutral Density and Graduated Neutral Density Filters?

Neutral density filters are even, edge to edge, in their degree of density while graduated neutral density filters are typically clear on one end and slowly build up density toward the opposite side of the filter. Graduated ND filters are most commonly used to even out scenes containing extreme exposure variations on opposite sides of the frame.

Without graduated neutral density filter (L); with graduated neutral density filter (R)

Examples of these types of scenarios include landscapes in which the top of a mountain is bathed in sunlight, while the valley below lies in shade; and multi-story atriums where the primary source of illumination is an overhead skylight from which the light gradually falls off as it approaches the lower levels. Graduated filters can also be used in evenly lit areas to darken the sky or foreground for stylistic reasons.

In addition to neutral graduated filters, colored grad filters are also available, and are useful for adding a touch of subliminal color into a scene while darkening the foreground or background.

Should I consider warming and cooling filters?

While warming (adding yellow to the scene) and cooling (adding blue to the scene) can be applied to an image file post capture in Photoshop or other image-editing software, there are still those—including film shooters, who prefer to filter the lens at the time the exposure is made.

Most photographers warm or cool their images for aesthetic or mood reasons. A bit of warming is often desired for portraits, or when photographing at midday during the summer months when the sun’s light can be bluer and harsh. Warming can also be effective when taking pictures on overcast or rainy days.

Conversely, cooling filters can be used to correct color in images in which the color temperature is too warm to suit your intentions. Warming filters include all 81 and 85-series filters, and cooling filters include all 80 and 82-series filters.

When using cooling, warming and other color filters with digital cameras, it’s important to set the White Balance to a setting close to the ambient color temperature, i.e. Daylight, Overcast, Tungsten, Fluorescent, etc., and avoid Auto WB, which will intuitively try to correct, according to its own parameters, the mood and tone you’re trying to establish. Auto WB may not render results that are in agreement with your personal vision.

I’ve heard landscape photographers talk about Enhancing and Intensifying filters. What makes them so special?

Enhancing and Intensifying filters are modified to cut some of the orange portion of the color spectrum, which results in higher saturation levels in reds and cleaner, less muddy interpretation of earth tones. They are especially popular for photographing fall foliage and landscapes.

I’ve seen photographers using red, green, yellow, and other color filters. Aside from making everything look red, green, yellow, etc, when should I consider using color filters?

While color filters do make everything look red, yellow, green or whatever color you might place in front of the lens, their most common use is for black-and-white photography.

When shooting black and white, the color of the filter being used blocks that color from reaching the film (or sensor) surface, which depending on the filter color and subject matter, can drastically change its tonal qualities. As an example, shooting through a yellow filter better delineates clouds against blue skies. Orange filters further darken blue skies and make the clouds pop more, and red filters darken blue skies even more and make the clouds pop out most dramatically.

Green filters on the other hand, are effective at improving skin tones in black-and-white portraits.

What are color-correction filters used for?

Color-correction filters, also called cc filters, consist of cyan, magenta, yellow, red, green and blue filters. Each of these is available in 10% increments and is used for modifying or correcting the color balance of mismatched or irregular light sources. The need for cc filters is not as great in these digital days as it was in the time of film. Nevertheless, they are still used by many photographers who would rather correct their images at the time of capture.

Without warming filter (L); with warming filter (R)

As with warming, cooling and other color filters, it’s advisable to avoid the Auto WB setting on your digital camera when using cc filters and instead choose daylight, overcast, tungsten, fluorescent or whatever setting is closest to the ambient lighting conditions under which you’re working.

Are there filters other than the glass screw-on types?

Aside from the glass screw-on filters most photo enthusiasts and pros depend on, there are also polyester, gelatin and resin filters, which are used for both creative as well as technical applications. Usually square or rectangular in form, these filters are most commonly used with filter holders or matte boxes that fit in front of the lens via screw-in or friction mount filter holder adapters. The filters are dropped into place in slots that keep the filters flat and parallel to the front lens surface in order to maintain optimal image quality.

Are polyester, gelatin or resin filters better than glass filters?

It depends on what you mean by “better.” If you mean sharper, some of these filters, especially the thinner resin and gelatin filters—depending on the brand and material—are optically purer than glass. They are also lighter to transport, and if you plan on purchasing an entire series of filters, these alternatives will be less expensive than a comparable set of glass filters.

These alternative filters are also handy if you have lenses with differing filter threads. All you need is a single set of step-down rings, starting with the largest thread down to the smallest size, to go along with the filter holder. (These same step-down rings can also be used with screw-in glass filters if you are using lenses with differing filter thread sizes—there’s no need to purchase multiple sets of filters.)

The downside however is that non-glass filters are easily damaged and in the case of gel filters, near impossible to clean when smudged by an errant fingerprint. So if you do go this route, be extra careful when handling them and by all means invest in a box of disposable plastic or cotton gloves.

What are slim filters?

Slim filters have narrow profiles and sometimes lack threads on the forward side of the filter ring. Slim filters, which are available in almost every filter size, are designed for use with lenses featuring angles of view wider than about 74°, or the equivalent of a 28mm lens. By utilizing a thinner retaining ring, the filter is less likely to vignette the corners of the frame. Depending on the make and model, many kit zooms require thin or slim-mount filters.

What other types of filters are there?

There are many types of creative and technical filters available for pros and serious enthusiasts alike. Included among them are filters that produce prism and star-like patterns, filters for close-ups, diffusion, infrared imaging, as well as contrast control. Their creative applications are up to you!

The Takeaway

UV / Haze and Skylight filters protect the surface of your lens against scratches, dust, moisture and fingerprints, which in the long term can harm the lens coatings. UV / Haze and Skylight filters also minimize atmospheric haze, which results in better overall image quality. Protective filters also keep dust, moisture and fingerprints at bay, but are not as effective in cutting through atmospheric haze.

The difference between an inexpensive filter and a pricier one has to do with the quality of the glass (the costlier filter most likely contains optically purer and thinner glass), the quality of the anti-reflective and color coatings and retaining ring (better filters have brass rings instead of aluminum).

Polarizing filters reduce or eliminate distracting reflections from the surface of glass, water and other polished surfaces, darken skies, make clouds pop from their surroundings and saturate color by reducing stray ambient glare.

Polarizing filters are also available combined with warming filters, enhancing filters and diffusion filters. Weather-resistant Kaeseman Polarizers are also available for use in extreme, damp climates.

Neutral density (ND)filters block varying degrees of light from striking the imaging sensor (or film) in order to shoot at wider apertures under bright lighting conditions, blur moving objects in the frame regardless of ambient light levels and allow for better exposure control when shooting video or film.

ND and Color Graduated filters darken or tint the top or bottom (or left and right) portion of the frame while leaving the opposite side untouched. They are useful for equalizing exposures of scenes containing extreme lighting variables on opposing sides of the frame, as well as adding an element of drama to an otherwise good, but not great, image.

Enhancing and Intensifying filters are useful for intensifying the color-saturation levels of reds and other earth tones, making them desirable for landscape and foliage photography.

CC filters allow you to incrementally adjust the color levels of your cyan, magenta, yellow, red, green and blue channels.

Though most photographers rely on conventional glass screw-in filters, lens filters are also available as square and rectangular filters made out of polyester, gelatin and resin. These filters, some of which are optically purer than glass filters, require holders and extra levels of care when handled.

If you plan on using one filter on several lenses, you should purchase a slim or thin version to better ensure it won’t vignette the corners of the frame when used on a wide-angle lens.

Landscape Photography

LANDSCAPE PHOTOGRAPHY

South Africa is spoiled for choice when it comes to landscapes. We have dramatic mountains, wide open spaces, deserts you name it. Looking at it often takes our breath away but why is it that our photographs often don’t do it justice.

Our eyes give us a perfect perspective when surveying a landscape but unless we know what we are doing a photograph will give us a flat perspective which takes all the drama out of the image. Getting the right exposure can also be a challenge with over exposed skies a common problem. What we want to do is create an image that replicates the image that our eyes took in. That is where the skills and the right equipment kicks in.

Our featured image was taken by Hougaard Malan, winner of the Landscape Photograph of the Year in 2016.

Expert Photography offer a Complete Guide to Landscape Photography

that will give you all the information you will need to set you on your way.

How to Choose the Correct Binocular for You

Buying a pair of Binoculars can be a difficult choice, mainly because we are spoiled for choice. There are many well known brands and even more obscure brands that manufacture great binoculars. Buying the right pair for you however, requires some circumspection.

Your decision should primarily be based on what you will be using the binoculars for; Is it for bird watching, game watching, sport, astronomy or just getting a closer look at your surroundings.

Your second consideration  should be where you will be using them. If you are static in a vehicle or watching whales from a balcony, the weight and size won’t be a major factor but if you are hiking you would want to get something compact and light.

Next you need to consider the magnification and the amount of light you require. The greater the magnification the narrower your field of view and the harder it is to focus. There are binoculars with built in stabalisation that counter the focus issue but it comes at a price. In good light most decent binoculars will do the job but in low light and in shadow the size of the objective (front) lens and the quality of the glass will make the difference. This is also where the last consideration comes in.

Your budget will play a determing role in your final choice. Better quality glass and sophisticated multi coatings add to the performance in most conditions but especially in low light conditions but it comes at a cost. There are however reasonably affordable Binoculars that perform extremely well. It is always a good idea to read the reviews.

Another great way of Birding is with a spotting scope. If you are Birding from a fixed position like a hide or balcony you can get even closer to your birds with a spotting scope. Here is some useful information about Birding with Spotting Scopes.

Camera Warehouse offer a great range of Binoulars at truly great prices.

For a complete insight into all the options and features to consider the link below gives a comprehensive overview of how to choose the Binocular for you.

https://www.wikihow.com/Choose-Binoculars